I love to play with paper and anytime I can take a few flat punched paper flowers and make them into a beautiful rose, all the better. I made the roses on these two cards and I will show you how in the next few steps.


To start you will need a flower punch like this Family Treasures one I have had for years. Or you can use a die. Any way you can cut three flowers with even petals will do. My punch is about 1.5" and makes about a one inch rose.

Punch three flowers and score or fold each petal into six sections.

With the flower #1, make a small slit on one fold line. Flower # 2, cut out one "wedge" and save this piece. Flower #3 cut out two wedges and save this piece. Five pieces in all.

Take piece #1 and overlap and glue two wedges to make a five petal flower. Take the stylus (any small round item will work) and curl each petal between your thumb and the stylus to curl the edge of the petal.
Take piece #2 and overlap and glue to make a 4 petal flower. Repeat the curling step. Take piece # 3 and repeat to make a 3 petal flower. Repeat the curling step. Take piece #4 and roll this with your stylus to make a cone shape and repeat this with #5. Sometimes it is a bit fussy to do this, but it will work.
If you would like to ink your edges, you can do this now.

Take piece #1, the 5 petal flower and turn it over on a soft surface. With the end of a pen or rounded tool, slightly depress the center to make the flower lay flatter on your card or scrapbook page.

Trim about 1/8 inch or so from the bottom of pieces 2 through 5.

To glue them together, I pour out a small puddle of Glossy Accents (or similar glue) on a scrap paper and start layering the flower. I dip the bottom of piece #2 in the Glossy Accents and set it in the center of piece #1. And so on, until you insert piece # 5 into the center.

And you have a beautiful rose! You can also use a bigger die or punch for a bigger rose or an 8 petal punch that will have an extra layer.

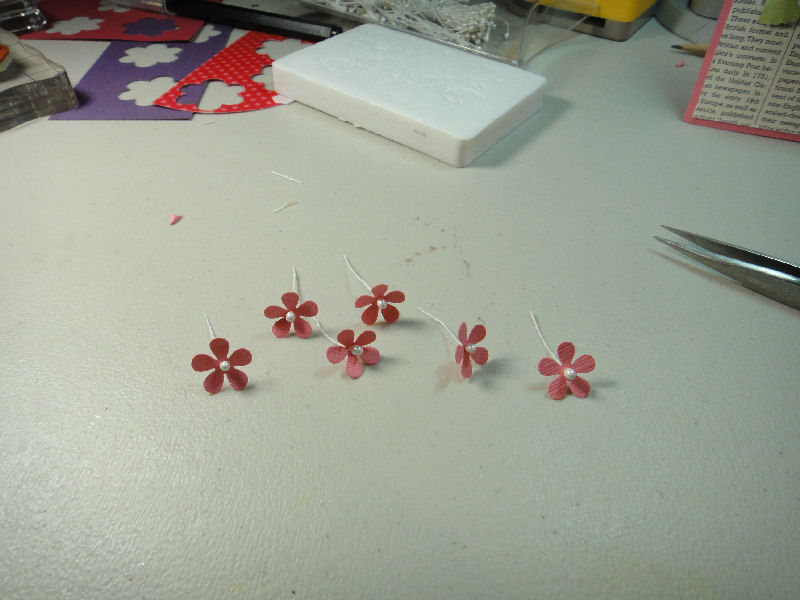
If you want to make some little accent posies, punch a tiny flower and insert a half of a floral stamen in each. I find it easier to punch the center hole first and then punch the flower around this hole. A tiny drop of glue in the center of the flower will hold the stamen in place. If you can't find the stamens in the craft store, check the cake supply store where they are used for fondant flowers.

Make several flowers and add them to card, tag or scrapbook page. I also added clear glass glitter on my rose colored card. For this card above, I used some floral stamens and punched leaves as accents.
Have fun!
Sorry for the drab color in the photos. Costco folding tables make a terrible photo backcround :)
Thank you for the tutorial Berta! Now if I forget how to make these, I can just refer to your blog :) And all three cards are beautiful, but I especially like the last one!
ReplyDeleteBerta I did try to make a rose after your crop, but it is not a beautiful rose! LOL I need to practice, lots. Thanks for the great tutorial to refer back to.
ReplyDeleteLove these! I finally got the Sizzix flower #3 die so I can make big ones, too. I love your tiny flowers witht he stamens. Now I have to go get some of those. Dang.
ReplyDeleteA great tutorial!! And what a gorgeous, fabulous card at the end. I think you should enter that in a SU contest :)!!!!
ReplyDeleteLovely!.....Must try!
ReplyDelete